We've decided to make less money: We've slashed our pricing for session replay. They're now more than 50% cheaper for most customers.

Session replay installation

Last updated:

|Edit this page

Session replay enables you to record users navigating through your website or mobile app and play back the individual sessions to watch how real users use your product.

Above is a recording of posthog.com… on posthog.com - very meta.

🚧 NOTE: Mobile recording is currently only available on Android and iOS and is considered beta. Check out the mobile recording page.

Step one: Install our JavaScript web library

If you already have our JavaScript library or snippet installed, you can skip this step.

Option 1: Add the JavaScript snippet to your HTML Recommended

This is the simplest way to get PostHog up and running. It only takes a few minutes.

Copy the snippet below and replace <ph_project_api_key> and <ph_client_api_host> with your project's values, then add it within the <head> tags at the base of your product - ideally just before the closing </head> tag. This ensures PostHog loads on any page users visit.

You can find the snippet pre-filled with this data in your project settings.

HTML
<script>
!function(t,e){var o,n,p,r;e.__SV||(window.posthog=e,e._i=[],e.init=function(i,s,a){function g(t,e){var o=e.split(".");2==o.length&&(t=t[o[0]],e=o[1]),t[e]=function(){t.push([e].concat(Array.prototype.slice.call(arguments,0)))}}(p=t.createElement("script")).type="text/javascript",p.async=!0,p.src=s.api_host+"/static/array.js",(r=t.getElementsByTagName("script")[0]).parentNode.insertBefore(p,r);var u=e;for(void 0!==a?u=e[a]=[]:a="posthog",u.people=u.people||[],u.toString=function(t){var e="posthog";return"posthog"!==a&&(e+="."+a),t||(e+=" (stub)"),e},u.people.toString=function(){return u.toString(1)+".people (stub)"},o="capture identify alias people.set people.set_once set_config register register_once unregister opt_out_capturing has_opted_out_capturing opt_in_capturing reset isFeatureEnabled onFeatureFlags getFeatureFlag getFeatureFlagPayload reloadFeatureFlags group updateEarlyAccessFeatureEnrollment getEarlyAccessFeatures getActiveMatchingSurveys getSurveys getNextSurveyStep onSessionId".split(" "),n=0;n<o.length;n++)g(u,o[n]);e._i.push([i,s,a])},e.__SV=1)}(document,window.posthog||[]);
posthog.init('<ph_project_api_key>', {api_host: 'https://us.i.posthog.com', person_profiles: 'identified_only'})
</script>

Once the snippet is added, PostHog automatically captures $pageview and other events like button clicks. You can then enable other products, such as session replays, within your project settings.

Option 2: Install via package manager

yarn add posthog-js

And then include it in your files:

Web
import posthog from 'posthog-js'
posthog.init('<ph_project_api_key>', { api_host: 'https://us.i.posthog.com', person_profiles: 'identified_only' })

If you don't want to send test data while you're developing, you can do the following:

Web
if (!window.location.host.includes('127.0.0.1') && !window.location.host.includes('localhost')) {
posthog.init('<ph_project_api_key>', { api_host: 'https://us.i.posthog.com', person_profiles: 'identified_only' })
}

If you're using React or Next.js, checkout our React SDK or Next.js integration.

Advanced option - bundle all required extensions

By default, the PostHog JS library will only load the core functionality, lazy-loading extensions such as Surveys or the Session Replay 'recorder' when needed. This can cause issues if you have a Content Security Policy (CSP) that blocks inline scripts or if you want to optimize your bundle at build time to ensure all dependencies are ready immediately.

You can include all extensions in your bundle by importing them directly before initializing PostHog. In addition you can configure the SDK to never load extensions lazily.

Web
import "posthog-js/dist/recorder"
import "posthog-js/dist/surveys"
import "posthog-js/dist/exception-autocapture"
import "posthog-js/dist/tracing-headers"
import "posthog-js/dist/web-vitals"
import posthog from 'posthog-js'
posthog.init('<ph_project_api_key>', {
api_host: 'https://us.i.posthog.com',
disable_external_dependency_loading: true // Optional - will ensure we never try to load extensions lazily
})
export const _frontmatter = {}

Step two: Enable session recordings in your project settings

Enable session recordings in your PostHog Project Settings.
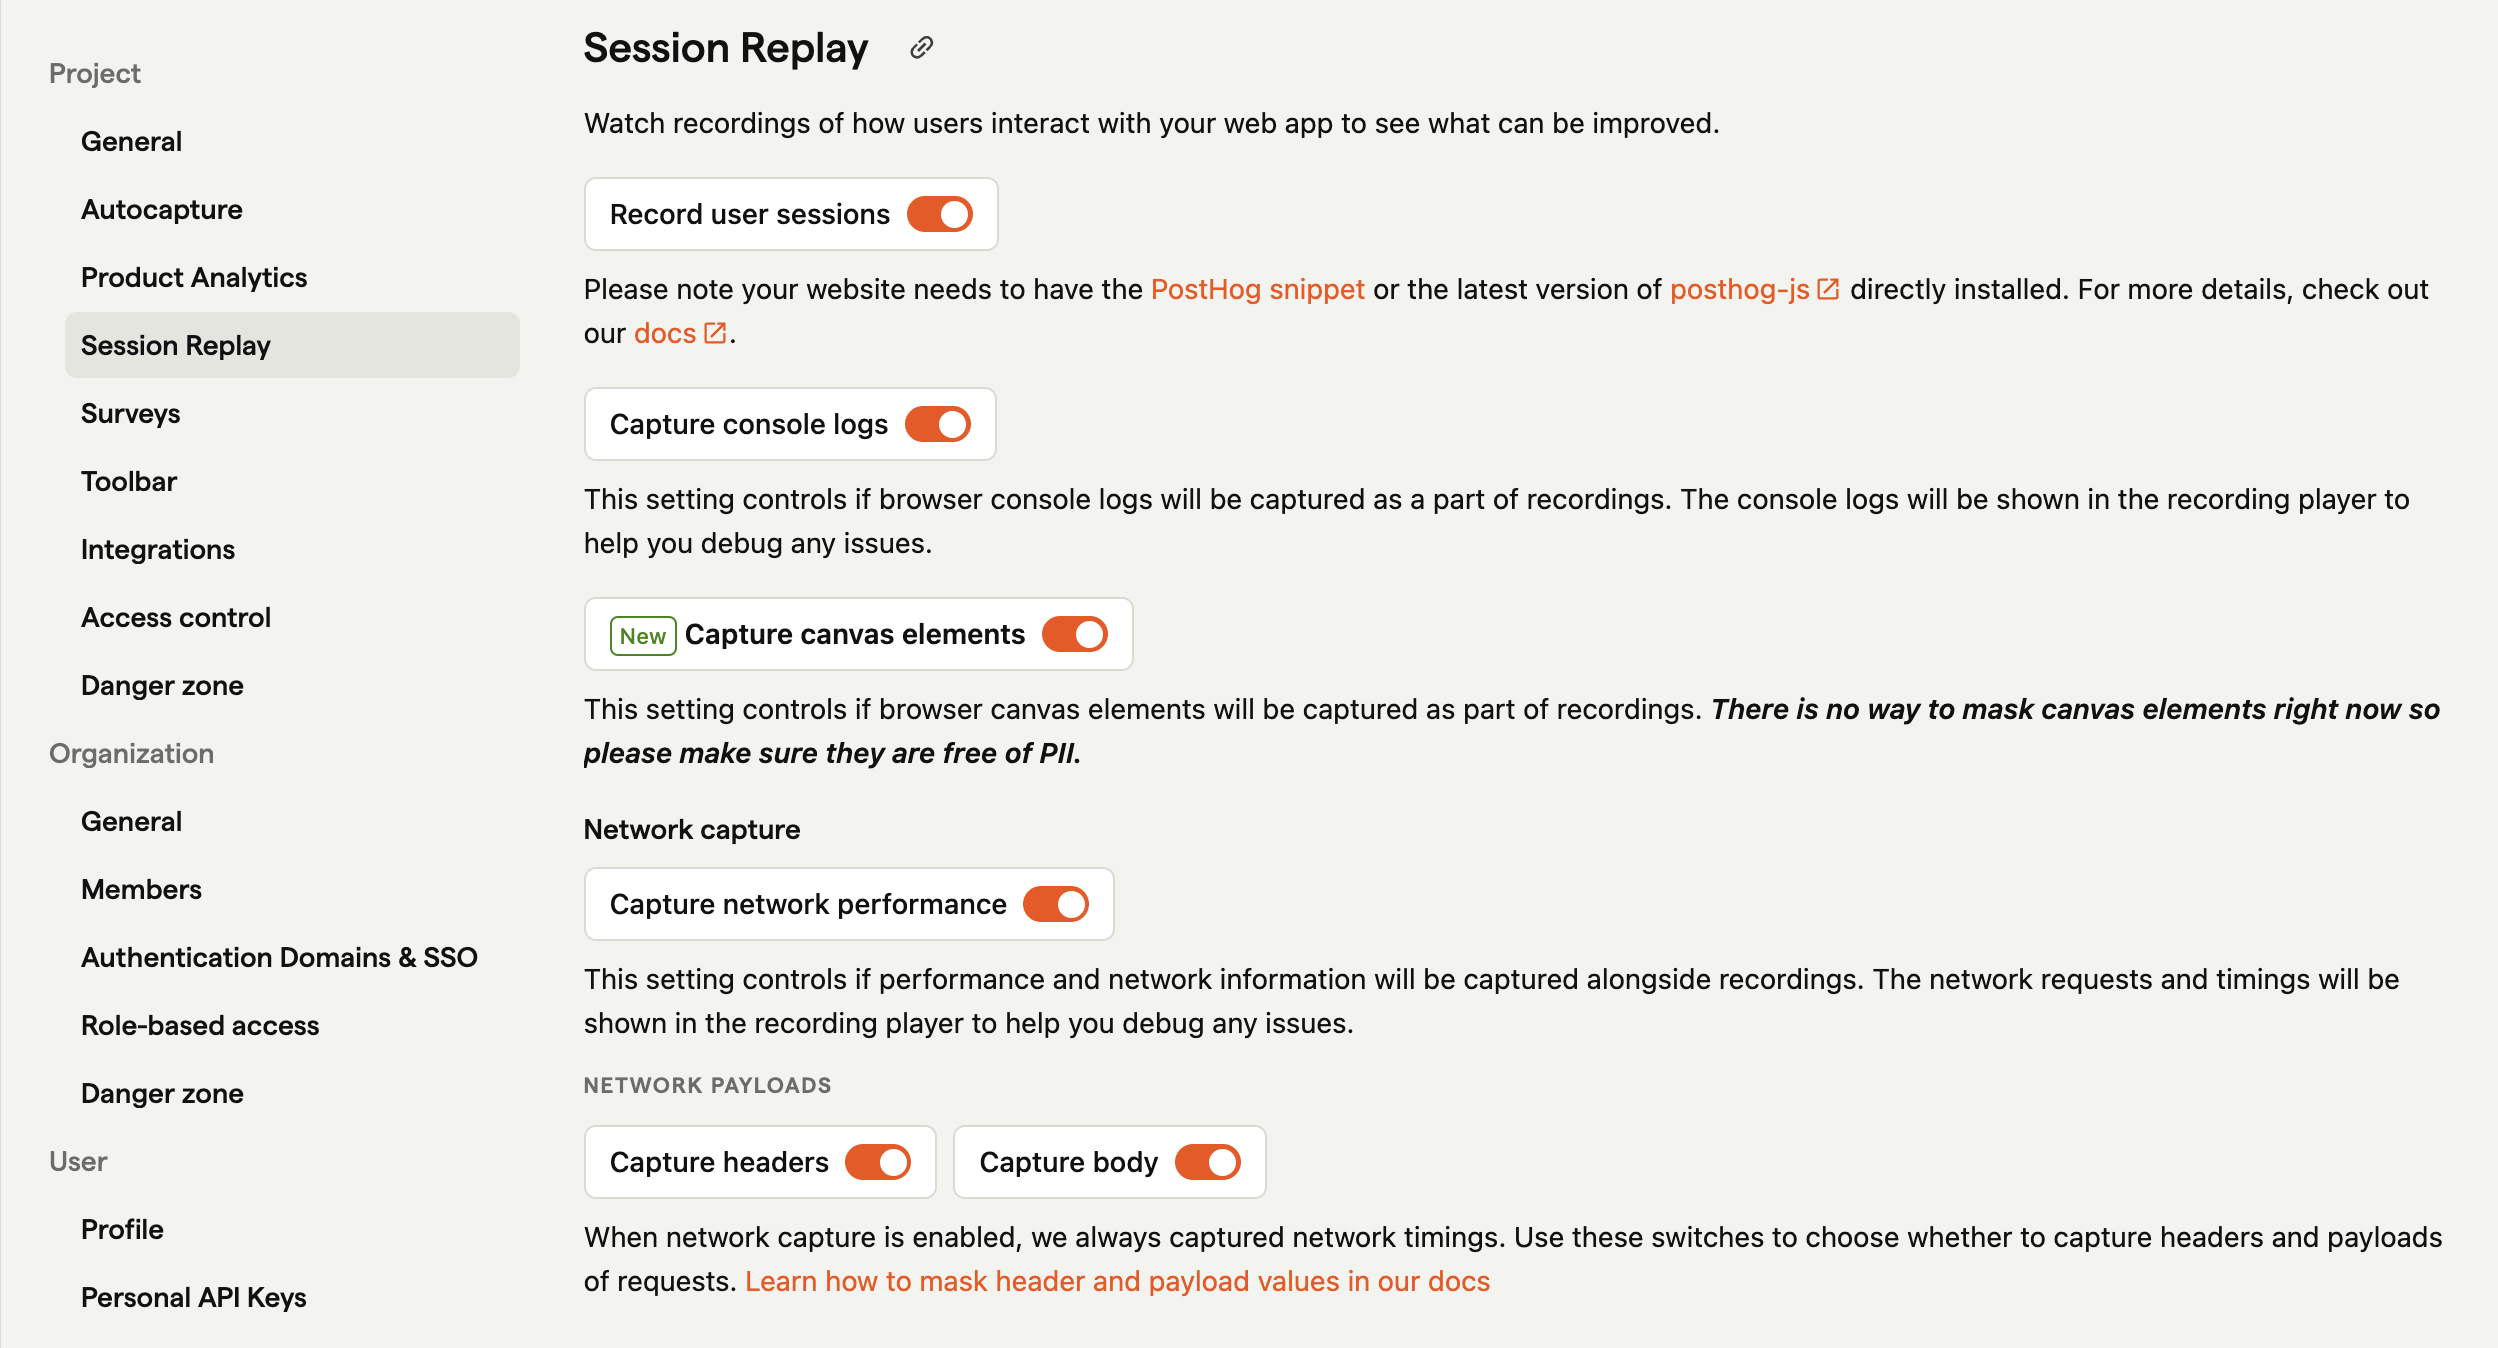
Enable session recordings in your PostHog'

Once enabled, the library will start recording sessions by default.

They can be toggled off in the by setting the disable_session_recording: true flag in the config.

Users who opt out of event capturing will not have their sessions recorded.

Note on using Segment's SDK: Session Replay does not work if you send data using Segment's SDK as this data is not collected. If you use Segment, you may want to add the PostHog library as well – (make sure to only send regular event data from one source).

How to ignore sensitive elements

You may want to hide sensitive text or elements in your replays. See our privacy controls docs for how to do this.

How to record sessions across different domains

PostHog automatically captures sessions across subdomains (e.g. posthog.com and us.posthog.com), but recording sessions across different domains (e.g. posthog.com and hogflix.com) requires a bit more setup.

To do this, you need to pass the session_id from the first domain to the second domain (for example, as a URL parameter). You can get this value by calling posthog.get_session_id().

Below is an example of how this looks like in Next.js:

JavaScript
// first domain
'use client'
import { usePostHog } from 'posthog-js/react'
export default function FirstDomain() {
const posthog = usePostHog()
return (
<div>
<h1>Welcome to the first domain</h1>
<button onClick={
() => window.location.href = `https://seconddomain.com/?session_id=${posthog.get_session_id()}`
}>
Go to the second domain
</button>
</div>
)
}

On the second domain, bootstrap the PostHog initialization using the session ID.

JavaScript
// second domain
'use client'
import posthog from 'posthog-js'
import { PostHogProvider } from 'posthog-js/react'
import { useSearchParams } from 'next/navigation'
export function PHProvider({ children }) {
const searchParams = useSearchParams()
const sessionId = searchParams.get('session_id')
if (typeof window !== 'undefined') {
posthog.init('<ph_project_api_key>', {
api_host: 'https://us.i.posthog.com',
bootstrap: {
sessionID: sessionId
}
})
}
return <PostHogProvider client={posthog}>{children}</PostHogProvider>
}

With this setup, PostHog tracks the user's session across domains and captures a single, combined replay.

Questions?

Was this page useful?

Next article

How to watch recordings

To watch recordings, you can visit the Replay page. When watching replays, you can change the playback speed, as well as select the option 'skip inactivity' - this skips parts of the recording where the user was inactive on the page. You can also watch recordings by clicking on any data point in an insight. This opens a list of persons and displays a "watch recording" button if available. This is especially useful in funnels , where you can drill down and watch recordings of users who…

Read next article